

PHLOVE Withdrawal: Cash-Out Steps, Wallet Setup & Checks
Withdrawal is one of those tasks that feels simple only when every detail is already in place. At PHLOVE, the process combines e-wallet setup, available balance, withdrawal amount, transaction password, and request history. A quick check of each item before submitting can save far more time than correcting a preventable mistake afterward.
For users accessing Phlove, the practical goal is not simply to find the Withdraw button. It is to make sure the receiving wallet is registered correctly, the requested amount is actually available, and the request can be tracked once it has been sent.
Set Up Your E-Wallet Before Withdrawing
A Withdrawal request starts before any amount is entered. Inside Personal Center, open Withdrawal, then switch to Account Management. This is where the receiving e-wallet is connected to the account.
The distinction between the two tabs is useful:
- Withdraw: Used to enter and submit a cash-out request.
- Account Management: Used to register the e-wallet that will receive the money.
If the right side of Account Management says “No E-Wallet linked yet,” there is nothing ready to receive a withdrawal. Trying to solve the issue from the Withdraw tab will not help; the wallet needs to be registered first.
Registering GCash
The e-wallet setup screen includes several fields and controls:
- E-wallet selection
- Name on Card
- E-wallet type
- Submit button
- Registered E-wallet counter
When GCash is selected, the e-wallet type is displayed as GCASH. The registered-wallet indicator appears as “Registered E-wallet (0/2)”, which means the account currently has room for up to two registered e-wallets.
This is one area where speed is not useful. A typo in the receiving information is much more troublesome than spending another 20 seconds checking it.
Treat e-wallet registration as part of the Withdrawal itself. The payout method should be correct before money is ever moved.
If the registered name or wallet details do not look right, fix the setup rather than hoping the request will somehow sort itself out later.
GCash and Maya Withdrawal Options
The Withdrawal area currently includes GCash and Maya as e-wallet choices. Both are familiar options for users who prefer receiving funds directly through an electronic wallet instead of handling a bank transfer.
The better choice is usually the one already prepared correctly.
Suppose GCash has been registered and verified in Account Management, while Maya has not yet been linked. Choosing GCash keeps the process straightforward because the receiving details are already connected to the account. There is little benefit in switching methods simply because another logo appears in the cashier.
Before choosing an option, check three things:
- The e-wallet is registered.
- The receiving details are correct.
- The wallet is under your control.
Available Withdrawal methods can change with account configuration, so the methods visible after login phlove should take priority over older screenshots or third-party instructions.
How to Make a PHLOVE Withdrawal
Once the e-wallet is ready, the Withdraw tab brings the rest of the process together.
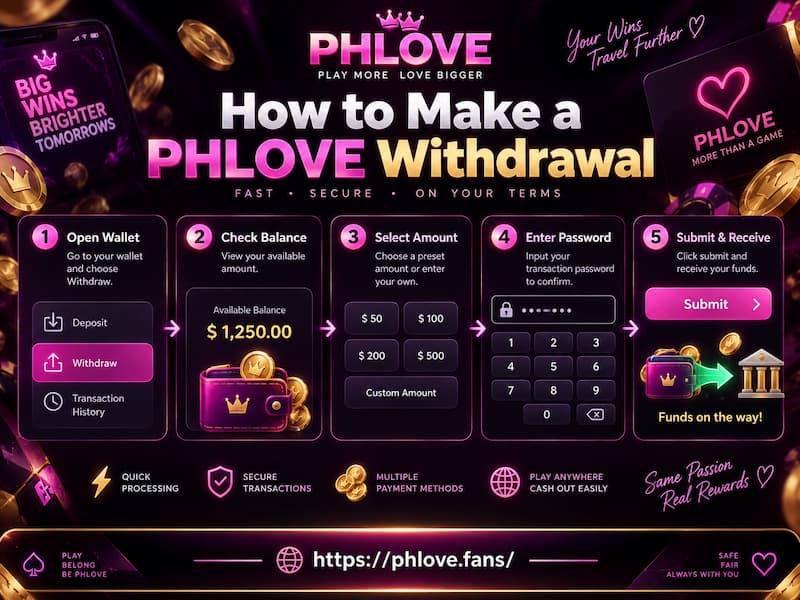
How to Make a PHLOVE Withdrawal
1. Check Central Wallet and Available Amount
Two figures appear near the top of the form:
- Central Wallet
- Available Amount
They should not automatically be treated as the same number.
Central Wallet reflects the balance held in the main wallet area, while Available Amount is the figure that matters when deciding how much can currently be requested through Withdrawal.
For example, imagine the Central Wallet shows ₱6,000, but Available Amount shows ₱4,000. Entering ₱5,000 simply because the total wallet balance looks high enough would ignore the more relevant Withdrawal figure.
If the balance looks outdated, use Refresh Balance before entering the request.
That small step is especially useful after funds have recently moved between wallet areas or after account activity has changed the available amount.
2. Choose the Withdrawal Amount
The cashier currently provides preset values including:
- ₱100
- ₱300
- ₱500
- ₱800
- ₱1,000
- ₱2,000
- ₱5,000
- ₱10,000
- ₱15,000
- ₱20,000
The amount field also displays a range of 100–20,000.
These preset buttons are convenient because they reduce typing mistakes. If the intended Withdrawal is ₱2,000, tapping the corresponding amount is quicker and cleaner than manually entering the number.
Still, the live cashier should always be treated as the final reference. Transaction limits can be adjusted, so a value displayed today should not be assumed to remain unchanged indefinitely.
3. Enter the Transaction Password
The next control is the Transaction Password field.
This is separate from the receiving-wallet information and adds another layer of control to the Withdrawal process. Without the correct transaction password, the request cannot simply be treated as complete because the amount and wallet are correct.
Keep this password private.
A support conversation, friend, agent, or other person does not need your transaction password simply to explain how the Withdrawal screen works. Anyone asking for it deserves extra caution.
4. Review Before Submitting
A good Withdrawal routine takes less than a minute:
- Confirm the selected e-wallet.
- Check Available Amount.
- Choose the intended Withdrawal value.
- Enter the correct transaction password.
- Review the registered wallet details.
- Press Submit.
That final review is where many avoidable problems can be caught.
A user intending to withdraw ₱5,000 to GCash, for example, should be able to confirm all three critical pieces at a glance: GCash selected, ₱5,000 entered, correct receiving wallet registered.
Withdrawal Limits and Daily Request Count
The current cashier displays a Withdrawal range of ₱100 to ₱20,000. It also provides preset values up to ₱20,000.
The useful way to read this information is as a live transaction range rather than a permanent promise. If the cashier later displays another minimum or maximum, the value shown inside the account at that moment is the one to follow.
There is another detail near the Submit area: “Remaining Number of Withdrawal Today: 20.”
This counter is more useful than it may first appear. It tells the user how many Withdrawal requests remain available for the day under the current account conditions.
Someone making several smaller withdrawals can therefore check the counter instead of guessing whether another request is still available.
Do not assume the number will always be 20. Treat it as a live account indicator.
Check These Details Before You Press Submit
Most Withdrawal problems are easier to prevent than diagnose afterward.
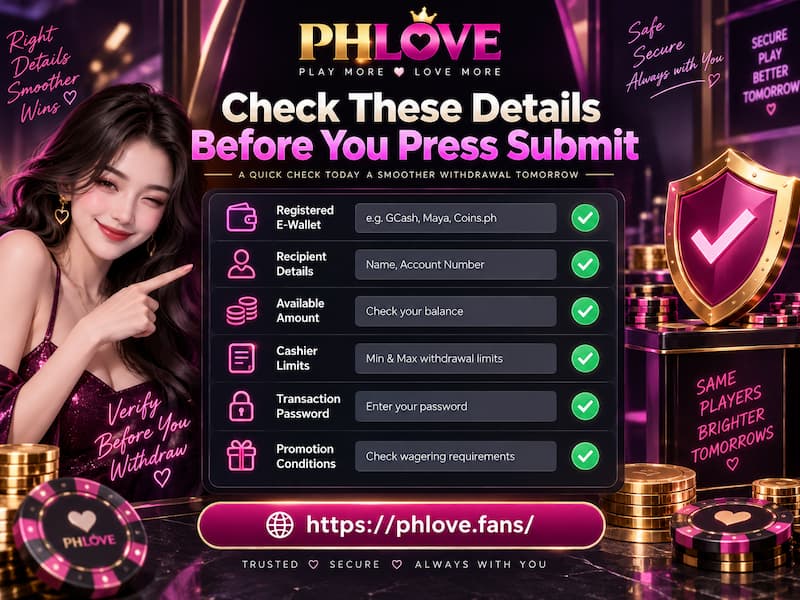
Check These Details Before You Press Submit
Before confirming a request, run through this short checklist:
- The intended e-wallet has already been registered.
- The recipient name and wallet details are accurate.
- Available Amount covers the requested Withdrawal.
- The amount fits the range currently shown in the cashier.
- The transaction password is correct.
- Any relevant Phlove promotion conditions have already been checked.
A balance can exist without every peso necessarily being available for immediate withdrawal under every account condition. If promotional funds or other restrictions are involved, check the applicable terms rather than assuming the largest balance figure is the amount that can be cashed out immediately.
When a Withdrawal Cannot Be Submitted
A disabled Submit button does not automatically mean there is a payment failure. Start with the fields directly involved in the request.
No E-Wallet Is Linked
Open Account Management.
If the registered-wallet area still shows “No E-Wallet linked yet,” complete the e-wallet setup first. The Withdraw form cannot send money to a destination that has not been registered.
Available Amount Shows Zero
Use Refresh Balance and check the figure again.
A zero Available Amount should not be interpreted from guesswork alone. It may simply mean there is currently no balance available for Withdrawal under the account’s present conditions.
Check the account activity and applicable conditions before repeatedly resubmitting the same request.
Submit Is Still Disabled
Review the form from top to bottom:
- Is an e-wallet selected?
- Is it registered?
- Is a valid amount entered?
- Does Available Amount cover it?
- Has the transaction password been entered?
One incomplete requirement can be enough to prevent submission.
Wallet Details Are Wrong
Do not deliberately send a Withdrawal to information you already believe is incorrect.
Return to the e-wallet management area and resolve the receiving details first. Correcting the destination before submission is far safer than trying to recover a payout sent using bad information.
Track the Withdrawal After Submission
Once the request has been sent, the Recent Withdrawal panel becomes the next place to check.
Before any request exists, this panel may display “No Withdrawal Request.” After submission, use the available transaction record to follow the request instead of immediately creating another one because the funds have not appeared yet.
The More button provides access to additional Withdrawal records where available.
This matters because a delay and a failed submission are not the same thing. If a request already appears in the Withdrawal history, submitting another identical amount could create unnecessary confusion.
Check the record first, then decide what action is actually needed.
Keep Withdrawal Access Secure
Withdrawal security should stay focused on the controls that protect money movement.
A few habits are enough to reduce unnecessary risk:
- Keep the transaction password private.
- Register an e-wallet you personally control.
- Check receiving information before confirming the request.
- Never share account or transaction credentials with someone offering to “process” the Withdrawal for you.
- Review Recent Withdrawal activity for unfamiliar requests.
If a Withdrawal appears that you do not recognize, contact support through the channel available inside the account and address it promptly.